Summary
This technical deep dive shows how FlashArray integrates with VMware using VAAI offloads for NFS, the Pure Storage vSphere Plugin to quickly provision datastores, Purity snapshot policies for recovery, autodir for per‑VM performance visibility, and Fast Clone for ultra‑fast VM cloning.


Welcome to the third installment of our series, where we dive into using FlashArray™ file with VMware. So far, we’ve covered the evolution of the file vs. block debate that has changed over time. Then, we looked closer at how we can set up FlashArray with NFS for a VMware environment manually.
In this blog, our goal is to demonstrate the engineering efforts Pure Storage has made to integrate into VMware shops. Our focus will be on items such as VAAI, snapshots, and the Pure Storage Plugin. This is the technical deep dive you’ve been looking for, so buckle up and let’s jump into the good stuff!
Understanding VAAI for NFS
VMware APIs for Array Integration (VAAI) is a set of APIs designed to offload storage-specific tasks to compatible storage arrays. Block storage was one of the first to receive this benefit with features like ATS, XCOPY, and Write Same, to name a few. But as more customers started to adopt NFS, the need for storage optimization for file also emerged.
Let’s dive into some of the VAAI file features that FlashArray supports:
- Full File Clone: This feature offloads tasks like cloning virtual disks/VMs and Storage vMotion operations to the array. This removes unnecessary read and write traffic from the data path.
- Fast File Clone: This offloads the creation of snapshots and linked clones to the array. It’s similar to Full File Clone but is specifically focused on snapshot and file redirection technologies.
- Reserve Space: While not as common, some IT teams prefer a “thick” provisioning methodology to limit the risk of multiple thin-provisioned disks filling up at the same time. This feature allows an NFS file to behave like a “thick-provisioned” disk, similar to what you see in block environments.
- Extended Statistics: By default, ESXi only has insight into basic capacity reporting for NFS datastores (provided natively by the NFS specification). This feature enhances this metric set by providing more insight into capacity utilization on thin-provisioned devices.
To get these features, you’ll need to upload the VAAI VIB to your ESXi environment, which you can find for download on the Pure Storage Support site. You’ll also want to install the Pure Storage Plugin. We will be leveraging this plugin to show off its capability to streamline your operations.
That same location provides instructions on how to upload the VIB by command line or vLCM.
Using the Pure Storage vSphere Plugin for NFS
In our last post, we looked at how to create an NFS datastore the old-fashioned way. Fortunately, since we’re leveraging FlashArray, we have the Pure Storage vSphere Plugin to save us time. Let’s take a peek at how easy it is to create an NFS datastore with the Pure Storage Plugin.
First, to create a new datastore through the plugin, we right-click on the cluster object > Pure Storage > Create Datastore.
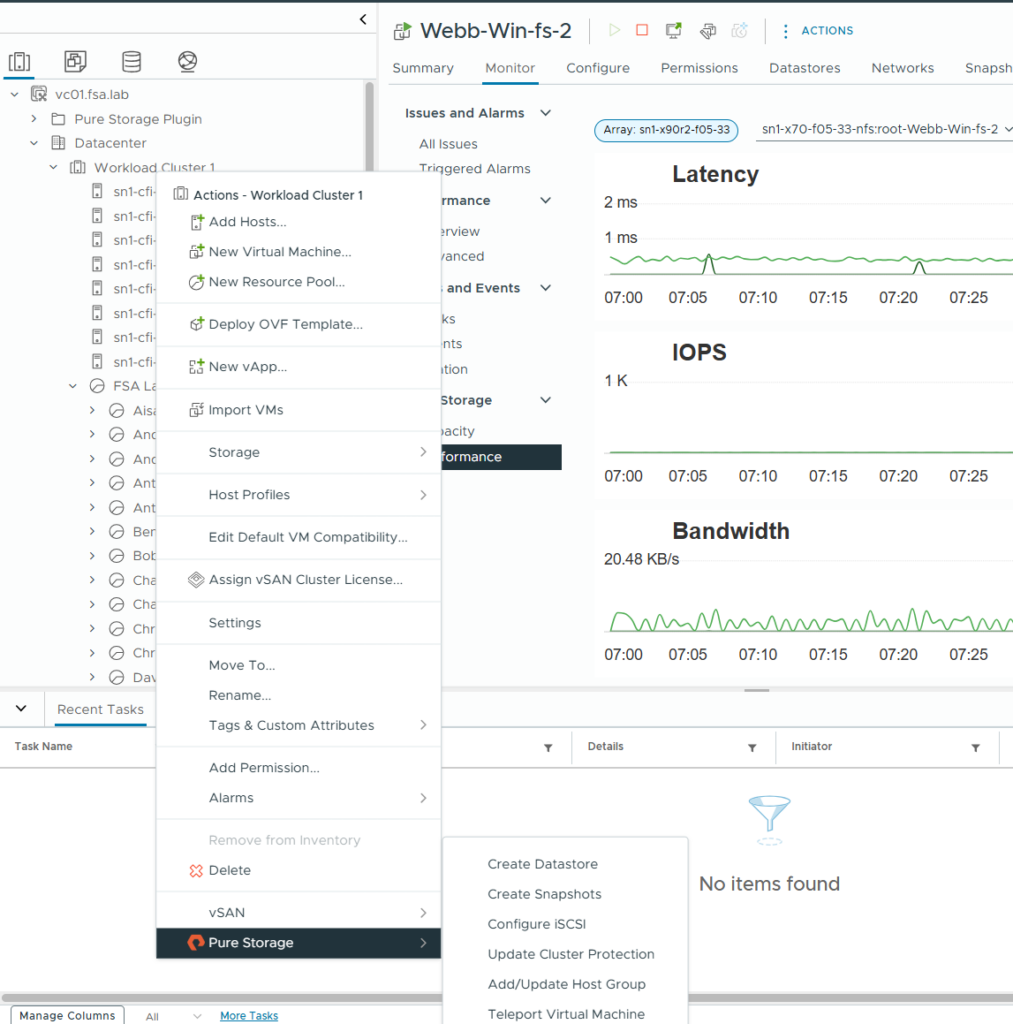
Select “NFS” as the datastore type.

The next screen is the compute resource. We select Workload Cluster 1.

Our next screen is all of the arrays we’ve loaded into the plugin. Select the array you want to use. The nice piece here is that if you have an older array that does not have File Services enabled, it will warn you.
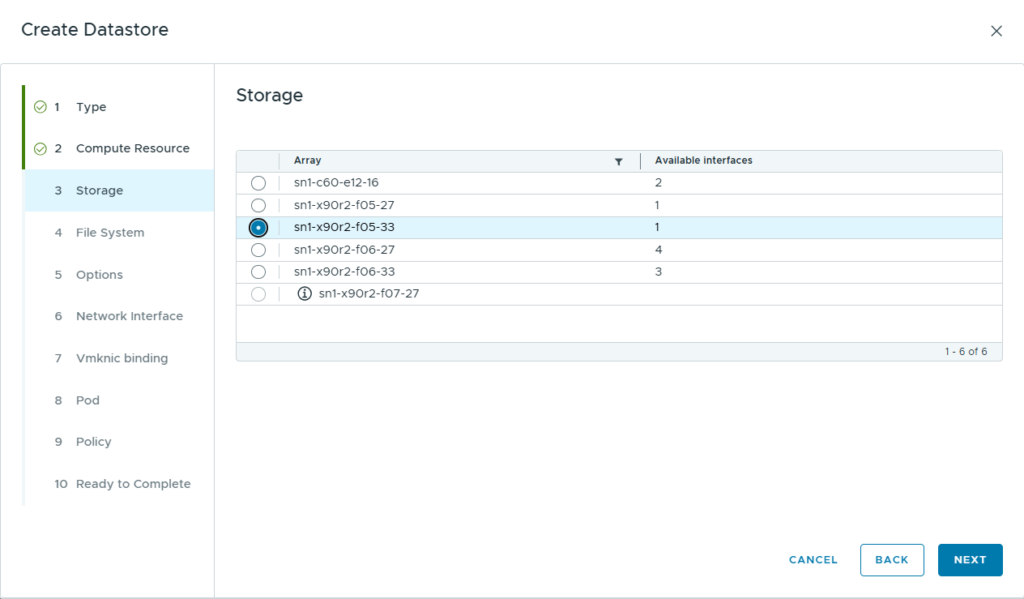
Next, let’s give the file system a name.

Here, we’ll choose the NFS version. The second field, “Number of TCP Connection(s),” is our nconnect setting. This value defines how many TCP connections we want to establish for this single NFS mountpoint. We’ll go with 4 connections.
A quick comment on what nconnect does: It’s another perfect example of the evolution of file storage over the years. Nconnect allows a host to establish multiple parallel TCP connections to a single NFS mount. This has been proven in multiple studies to dramatically increase throughput, which had historically been a “chink in the file armor” when compared to multipathing in block storage.
FlashArray can support up to 16 connections, while vSphere 8.0 (as of Update 1) currently supports a maximum of eight.

Next, it will pull our file interfaces. In our case, we only have one to go off of.
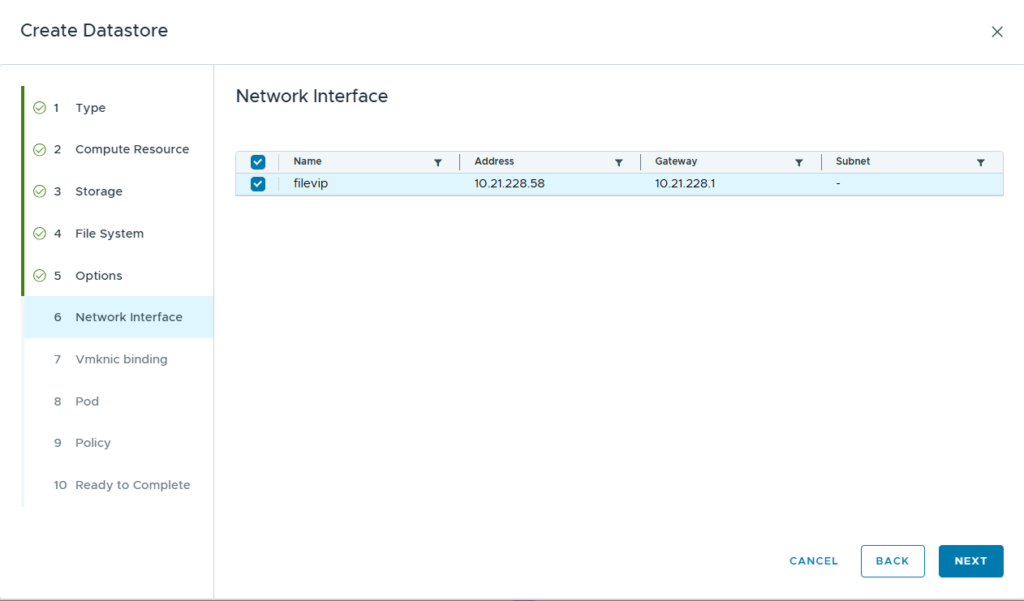
Next will be our Vmknic binding. For more information on networking best practices for file, check out “Networking Best Practices for File” (Pure1® login required).

Next, we’ll select a pod. Pods are often used when we’re setting up storage that will be used in replication. For this demonstration, we are not going to leverage a pod.

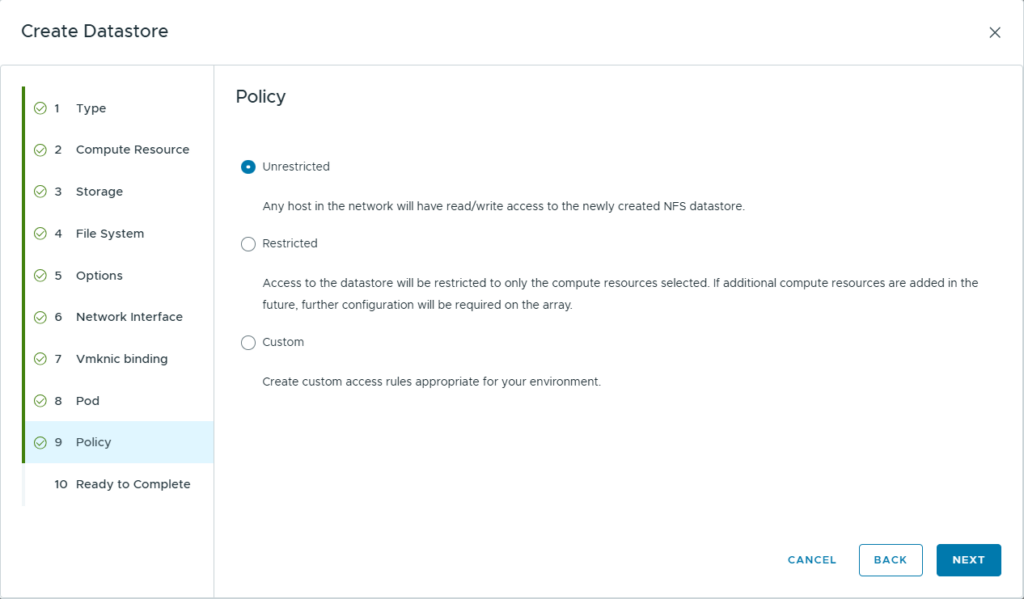
In our final step, we’ll choose an export policy to associate with the file system. Just like we did in Part 2, there has to be an export policy to successfully mount the datastore to your hosts. We’ll use an “Unrestricted” policy, as this closely matches what we did in the previous blog as a simple export.
The final screen will have all of your details listed. Confirm them and click Finish.
While you could manually create datastores like we did previously, the beauty of the plugin is that it streamlines this entire process into a single, guided workflow.
Imagine getting your favorite toy building bricks to make a spaceship. The manual method is like dumping the box out and finding that there aren’t any instructions and the bricks aren’t organized. The plugin, however, provides the instructions and organizes the pieces for you, guiding you step-by-step for simplicity and speed.
Once the workflow is finished, we can immediately view our newly provisioned datastore and its settings.

Easy stuff, right?! Let’s check out what else we can do with the plugin.
Using Snapshots in the Pure Storage VMware Plugin
Snapshots are an important tool in any infrastructure for a wide variety of use cases. The most common use case is to roll back a VM’s state if something was deleted or corrupted. Let’s take a quick look at how we can accomplish that.
There are two ways we could take a snapshot. We could right-click the datastore in vCenter and select “Take Snapshot.” But instead, we’re going to make a snapshot policy in Purity so that we have automated snapshots we can leverage. We will start in Purity > Protection > Policies and click the “+” icon.

Give it a name and make sure it is enabled.
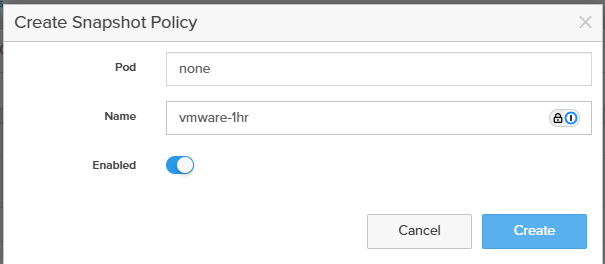
Now, enter into the policy by clicking on it. Here, we’re going to make a rule by clicking the “+” again. To keep it simple, we’ll do a snapshot every one hour and keep them for 24 hours.

Now, we need to add our file system to our members of this policy. Click on the three dots and add members. I’m going to do it on the root file system so that all of our VMs have the same snapshot policy.

Now that our snapshot policy is created, confirm our snapshot has been taken by going to Purity > Storage > File System and choosing our file system. You should see a new snapshot under the snapshot section.
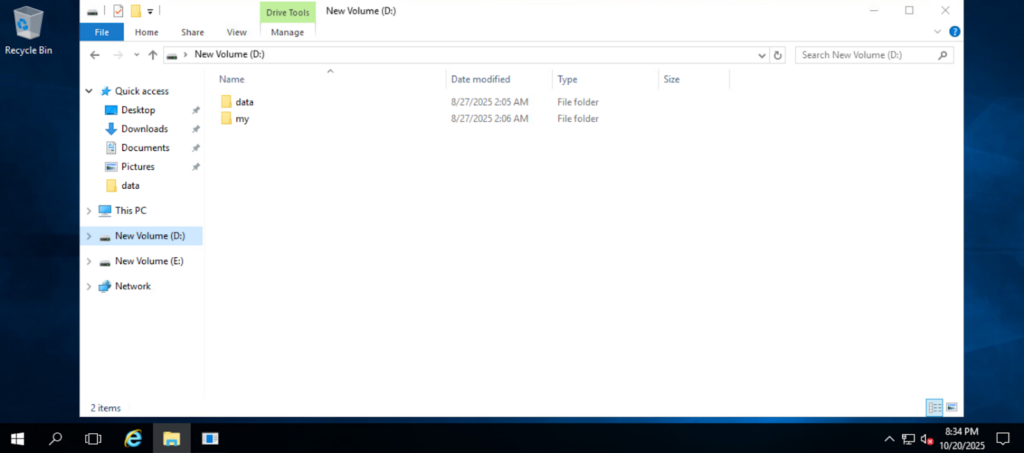
Now, let’s log in to one of our VMs on this datastore and delete some data.

To be able to use the “recovery from snapshot” feature, we need to turn off the VM. Then, we right-click the specific VM > Pure Storage > Recover from Snapshot.

Fortunately for us, we only have one. If you had a long list, you’d want to identify the correct timeframe to revert to.
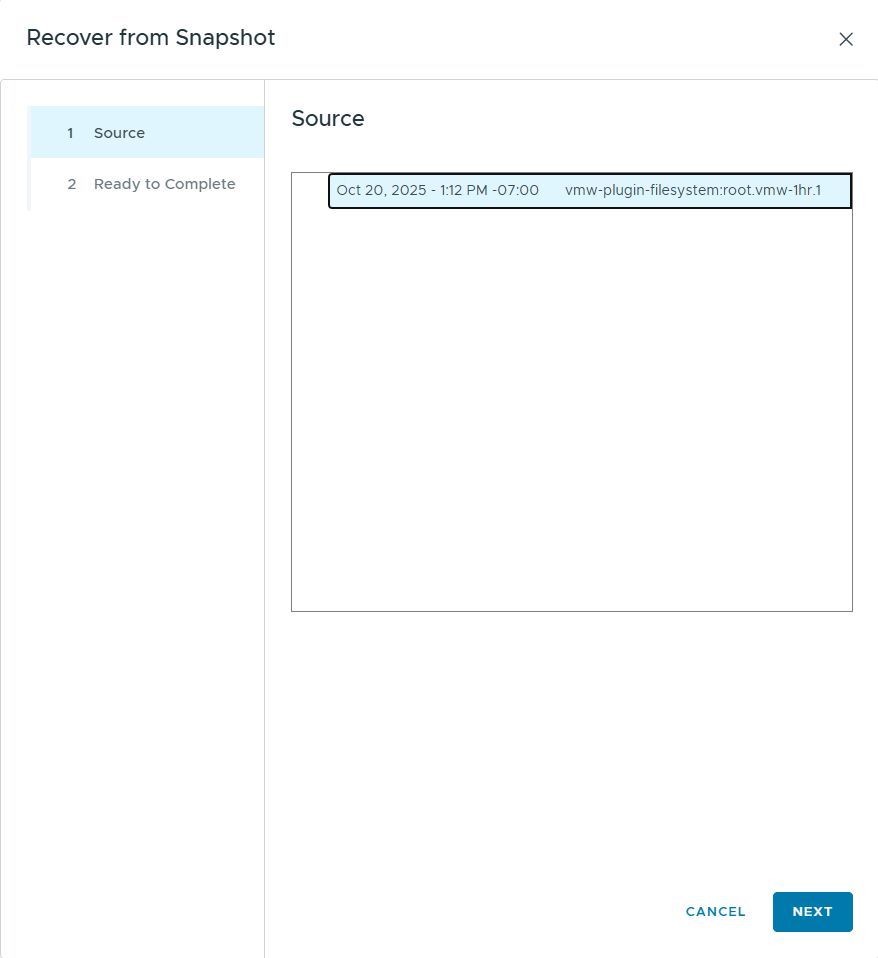

Hooray, our data is back!
Monitoring Per-VM Performance with Auto-Directory
Another nifty feature of NFS on FlashArray is the auto-directory (autodir) feature. When autodir is enabled on a file system, each new VM moved to the datastore automatically creates its own managed directory within that file system on FlashArray.
It’s important to note that the key word here is new. Enabling autodir will not retroactively create directories for existing VMs.
This capability is powerful because it allows us to apply storage features, like snapshots, at the individual VM level rather than only to the entire file system. For example, you could apply a more aggressive snapshot policy to a single critical VM for recovery purposes.
The other major benefit is that we can provide per-managed directory statistics that can be “bubbled up” directly into vCenter. Since we’re using the latest Plugin of 5.4.0, autodir is automatically enabled on new nfs datastores. If you’re on an older version, you may need to tick a checkbox during creation to have this feature enabled. Or you can refer to our second blog on how to enable it on existing file systems.
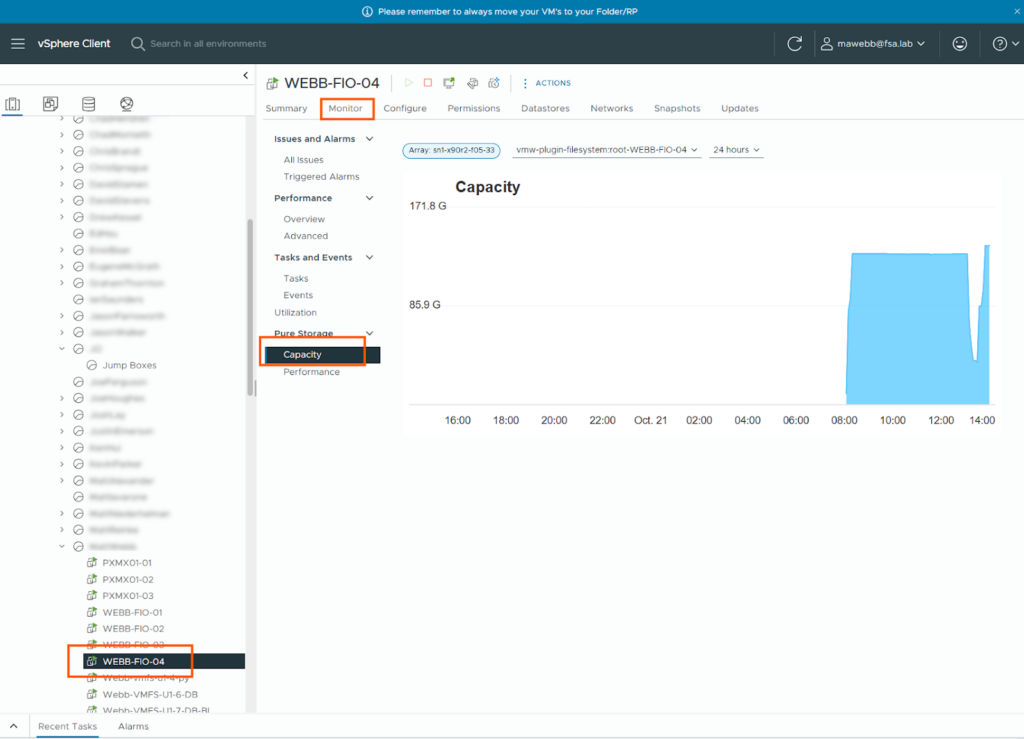
In our lab setup, there’s a set of FIO machines used to generate I/O. Let’s kick off a workload and monitor the capacity and performance.
First, let’s take a look at the capacity graphs. This machine was moved to the NFS datastore with a Storage vMotion and then had some data cleanup before loading a test file for an FIO run. You can find this view under the VM > Monitor > Pure Storage > Performance.
Next, let’s take a look at the performance view. Go to VM > Monitor > Pure Storage > Performance. You can see the FIO run over the last hour of time.

Taking Advantage of Fast Clone
The last item we’ll look at is the benefits of a VAAI functionality called Fast Clone. Like XCOPY with block, Fast Clone allows the array to offload the operation of cloning data in specific scenarios. With large VMs, Fast Clone can make a significant difference as it is blazingly fast and makes sure data is not sent over the network unnecessarily. Since FlashArray already knows what is written, we simply update pointers to serve the data.
To demonstrate this, I’ve got a file server and used PowerShell to make a data file approximately 2TBs in size, as seen below.

Now, for Fast Clone (and its similar feature on block, XCOPY), there’s a catch on Windows. When your VM has the settings of “disk.EnableUUID = TRUE” and the VM is on, Fast Clone will not work. But this will work with the VM off. So we’re going to turn off the VM.

Now, we’re going to clone.

And we can see from the recent tasks, this operation only took one second to complete!

To give you a feeling of how much time this saved, I cloned this VM without leveraging Fast Clone, and it took nearly an hour to complete!
Wrap-Up
That completes our deep dive into VMware integration with NFS on FlashArray. Hopefully, you were able to take away some of the capabilities that NFS on FlashArray for VMware workloads can offer you and your organization.

Free Test Drive
Try FlashArray
Explore our unified block and file storage platform.
Free Test Drive
Sign up to experience the future of data storage with Pure Storage FlashArray™.